

As Halloween is just around the corner I decided to do something a little bit more creepier than my usual make-up and of course I had to do a zombie wound. As usual I will list all the products I used to create this look below and if you have any questions or comments please leave them below or sent me a tweet.

Products used;
PVA glue
Tissue paper/kitchen roll
Fake Blood
Black nail varnish
Red nail varnish
Foundation and/or concealer
Setting powder or Baby powder
Brown, black and blue eyeshadow
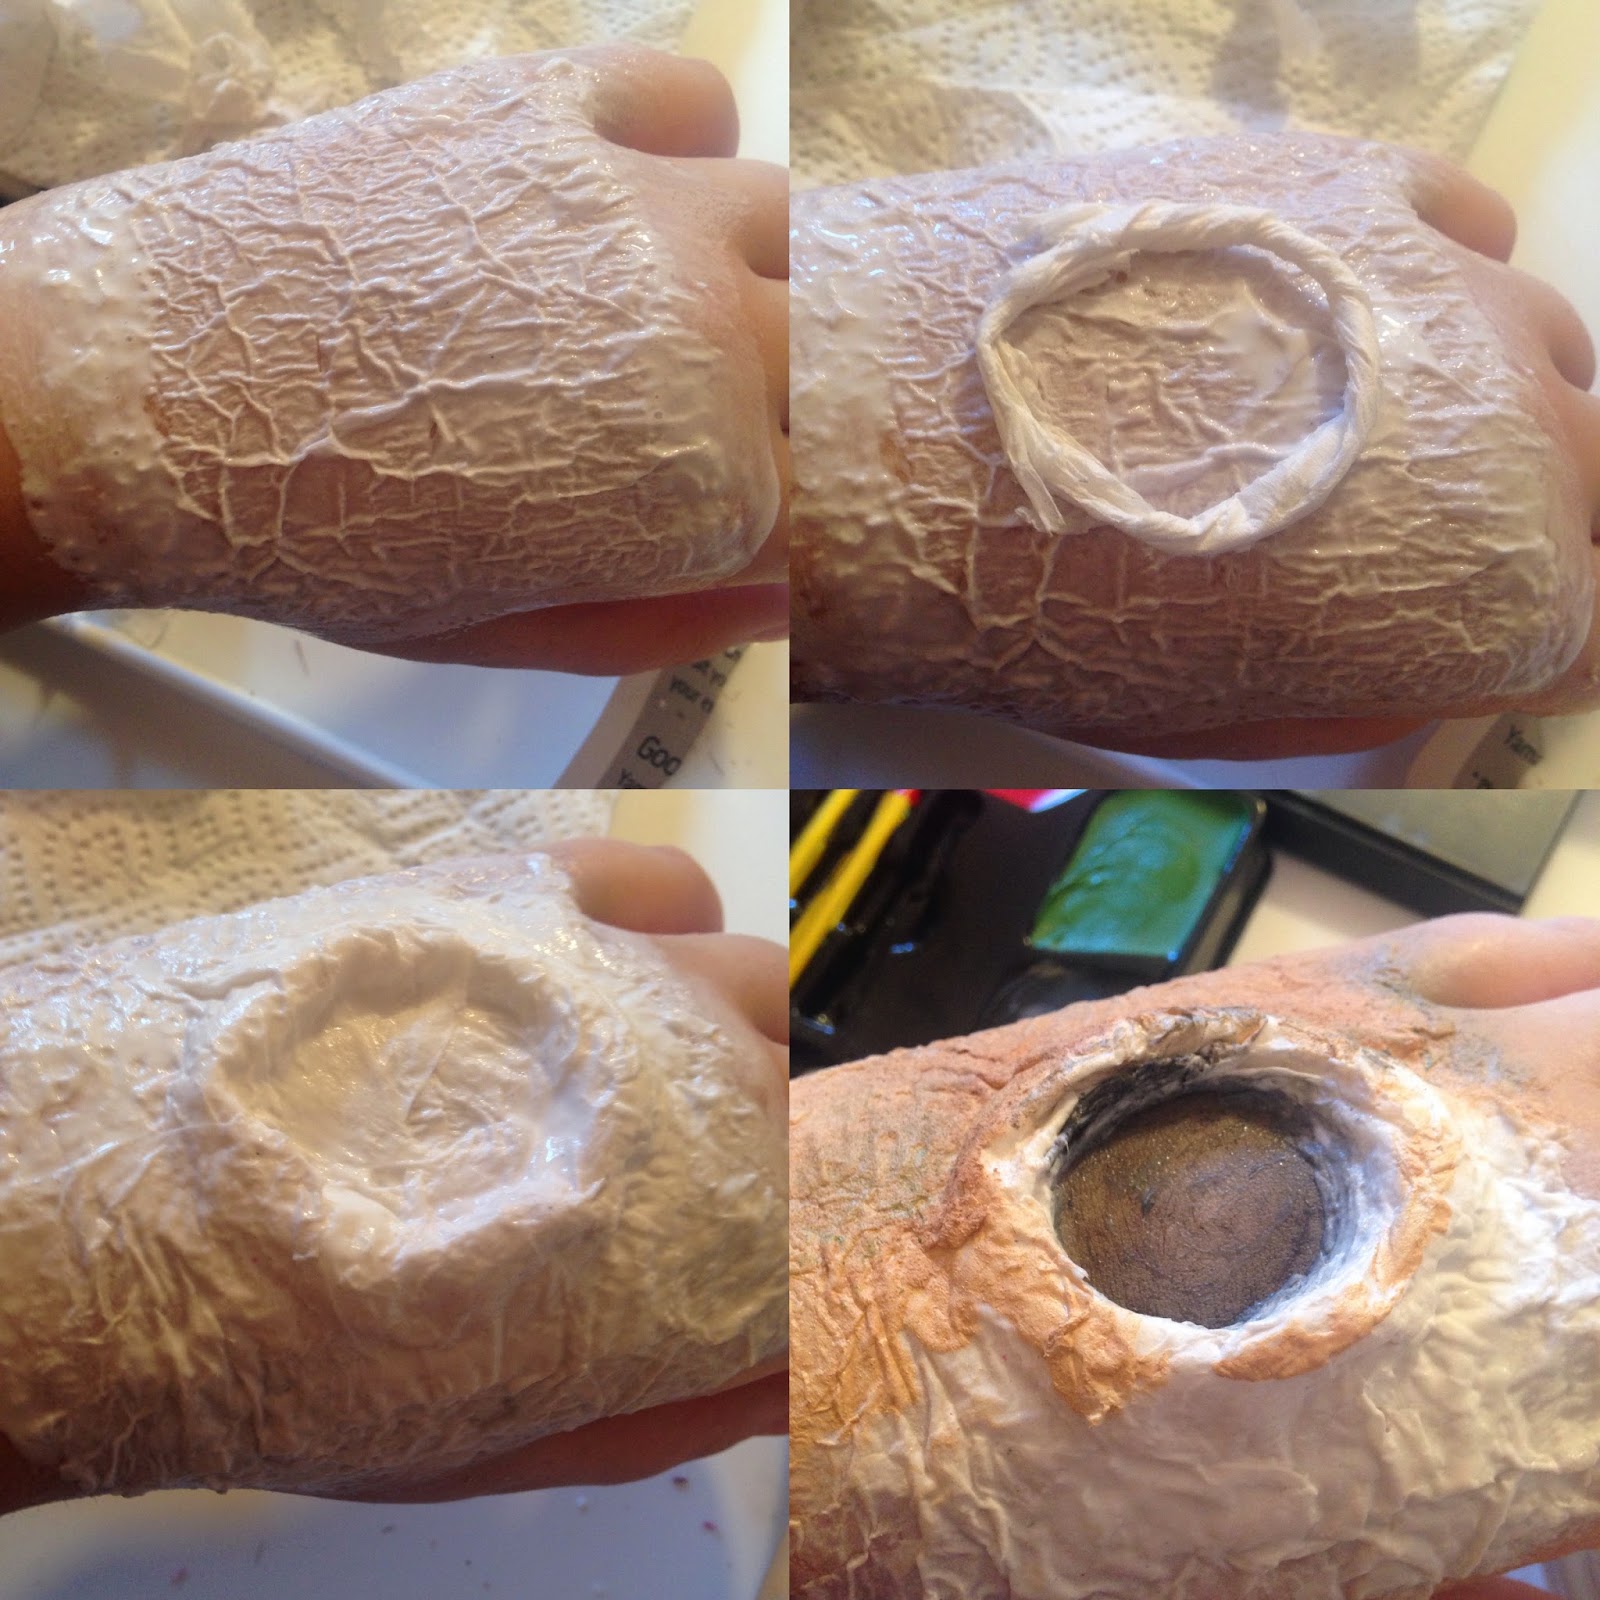
- first put one layer of tissue on the area where you plan to make the wound
- roll up pieces of tissue into sausage shapes and map out the wound
- add multiple layers of tissue and PVA glue over the wound outline to make it look more seamless
- once the tissue paper is dry cover the tissue with a foundation or a concealer and carefully cut the center of the wound, then fill the center of the wound with a black eyeshadow or facepaint.

- set the foundation or concealer with a setting powder or baby powder this help reduce any shine from the PVA glue. Add red nail varnish to the rim of the wound and add small amounts of black to the rim to make it look like congealed blood
- fill the wound with fake blood, as much or as little as you like
- add black, brown and blue eyeshadow to your new zombie skin, the more you add the more dead you look.

If you would like to see more tutorials comment bellow or send me a tweet!

No comments:
Post a Comment